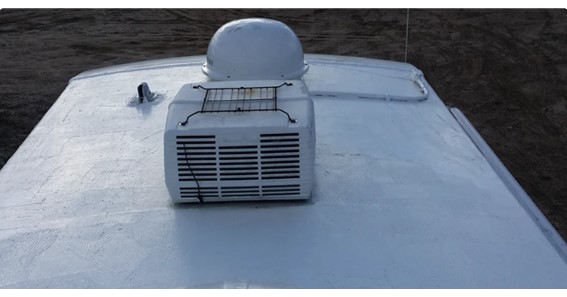
When it comes to maintaining your camper, ensuring a leak-free roof is essential. A well-maintained and sealed roof can protect your RV from water damage, mold, and other issues that can compromise its integrity. Liquid rubber roof sealant has gained popularity among DIYers as an effective and long-lasting solution for camper roof repairs. In this comprehensive guide, we’ll explore why liquid rubber technology is the best modern-day option for sealing your camper roof and how to use it to repair your RV roof.
Why Use Liquid Rubber Roof Sealant for Campers?
According to The Global Waterproofing Membrane Market, the market for liquid rubber is projected to reach $10.5 billion by 2024. This growth can be attributed to the increasing demand for waterproofing solutions, like liquid rubber, in various industries. Liquid rubber’s popularity as a roof sealant for campers can be attributed to the following factors:
- Long-lasting protection: Liquid rubber provides a seamless, waterproof barrier that can last up to 10 years. This means you won’t have to reapply the sealant as often, saving you time and money.
- Versatility: Liquid rubber can be used on a variety of surfaces, including metal, fiberglass, and rubber roofs. This makes it suitable for different types of RV roofs.
- Ease of application: Liquid rubber roof sealant is easy to apply, making it an ideal choice for DIY enthusiasts. You can use a paintbrush or a roller to apply the sealant, and it dries relatively quickly.
- Environmentally friendly: Liquid rubber is a water-based, low-VOC product that is safe for the environment. What’s more, it is also safe to use around plants and animals.
Preparing for the Task: Gather Needed Materials and Tools
Before you start sealing your camper roof, make sure you have the necessary materials and tools:
- Liquid rubber roof sealant for campers (available at Liquid Rubber’s online catalog)
- Liquid rubber RV roof smart cleaner
- Bucket, sponge, and cleaning solution
- Scraper, paintbrush, and roller
- Rubber gloves, eye protection, and a mask/respirator (if required)
Safety First: Precautions When Sealing Your Camper Roof
Before you begin the task of sealing your camper roof, keep these safety precautions in mind:
- Choose a dry, sunny day for the task to ensure proper drying of the sealant.
- Wear rubber gloves and eye protection to protect yourself from chemicals or debris.
- Use a respirator if there’s a lot of dust on the roof.
- Ensure you have secure footing to prevent any accidental falls.
Cleaning the Roof: The First Step in Applying Roof Sealant
To ensure proper adhesion of the sealant, thoroughly clean your camper’s roof using the Liquid Rubber RV Roof Smart Cleaner. For detailed cleaning instructions, use this in-depth guide: Keeping Your RV Roof Clean: How to Use the Best Rubber Roof Cleaner.
Make sure to wear gloves during the cleaning process to avoid damaging the roof with oils from your hands. After cleaning, use a scraper to remove any loose debris and old sealant before applying the new layer.
Applying the Liquid Rubber RV Roof Coating
Before applying the Liquid Rubber RV Roof Coating, ensure that it is thoroughly mixed for optimal coverage. If you notice any signs of corrosion on your camper’s roof, you’ll want to first apply a primer before the roof coating. Once the primer is dry, you can use a paintbrush or roller to apply a generous coat of the Liquid Rubber RV Roof Coating. Allow it to sit for a few minutes before using a clean, damp sponge to remove excess sealant.
- Wait for the first coat to dry before applying a second coat (about 8 hours).
- Make sure the sealant doesn’t drip or run, indicating that it’s working effectively.
Click Here – Exploring the Pros and Cons of the Subscription Business Model
Inspecting the Roof After Sealing
Once the sealant is completely dry, inspect your camper’s roof for any drips or runs. If you find any issues, you may need to reapply the sealant. Regular maintenance is crucial for keeping your camper’s roof in top shape. You can find more information on maintaining your RV roof in this guide: Recoating Your RV Roof: When and How Often to Do It.
Tips for Maintaining Your Camper’s Roof
To keep your camper’s roof in excellent condition, follow these maintenance tips:
- Clean and reseal your camper’s roof annually.
- Apply a UV protectant to safeguard against sun damage.
- Regularly inspect your roof for signs of wear, tear, or leaks.
Wrapping Up: Dependable and Approachable Expert Advice
Sealing your camper’s roof is a crucial step in keeping it in excellent condition for years to come. By following this comprehensive DIY guide on how to seal a rubber roof on a camper, you’ll be well-equipped to tackle the task with ease. Protect your camper, motorhome, or RV from water damage and other issues by using Liquid Rubber’s high-quality products and ensure worry-free travels for years to come. For more information on liquid rubber technology and its benefits, check out this in-depth article on sealing camper roofs. Happy DIYing, and we hope your next adventure is amazing!